Using BigRingVR
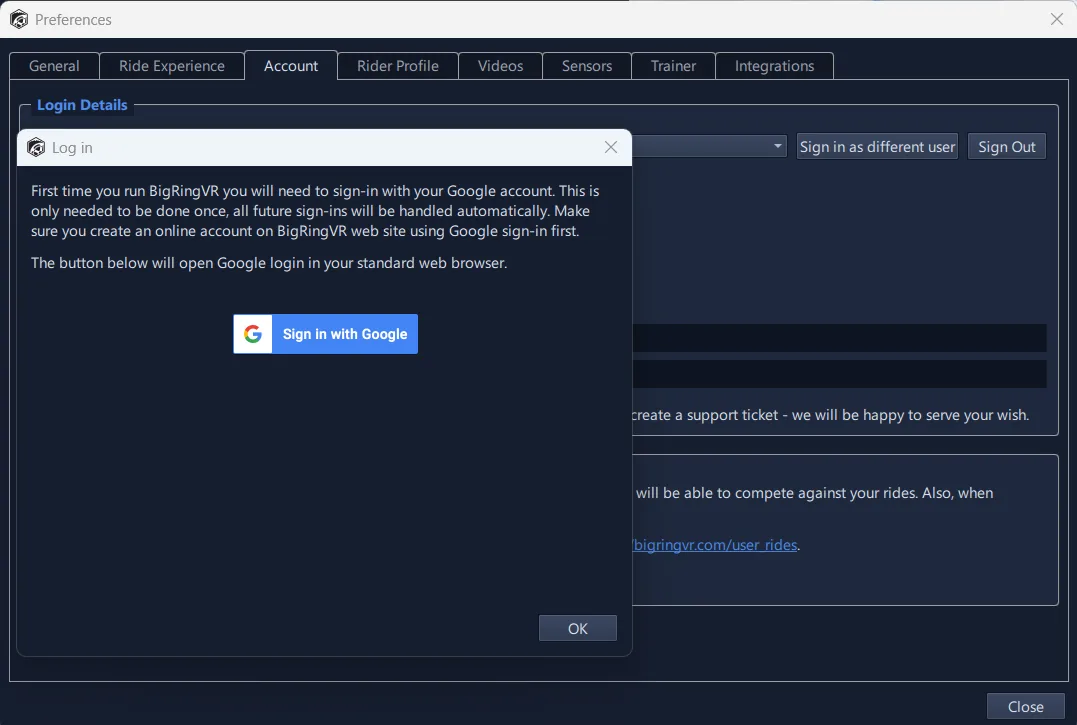
Sign in with Google Account
The first time you run BigRingVR, you'll need to sign in with your Google account. This only needs to be done once — all future sign-ins will happen automatically. Before signing in from the app, make sure you've created an online BigRingVR account using Google sign-in, or you may encounter an error.
Configuration
Pair Your Trainer and Sensors
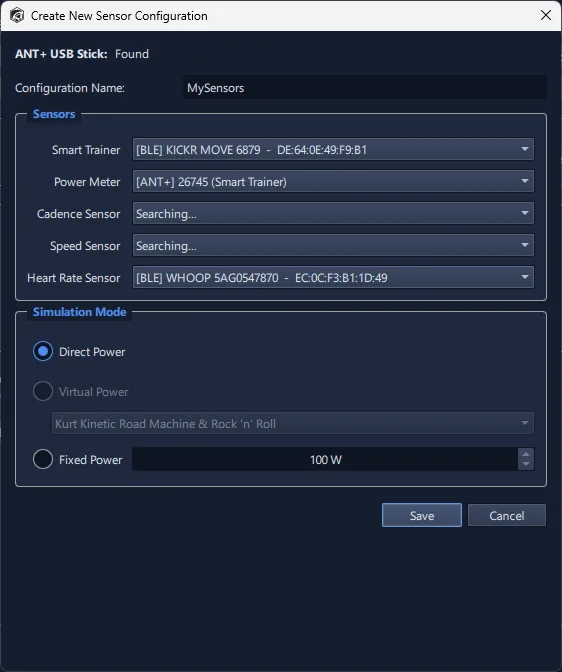
Open the sensor configuration screen — the first-run setup wizard walks you through it, or go to Preferences → Sensors and click New Configuration. BigRingVR scans for ANT+ and Bluetooth devices side by side, filtered to real cycling sensors, and you can freely mix the two — for example an ANT+ heart-rate strap with a Bluetooth power meter and a Bluetooth trainer.
- Smart trainer — pick your trainer as the smart trainer so BigRingVR can control resistance. Tacx NEO trainers appear over Bluetooth using Tacx's FE-C protocol; choose the entry labelled (Tacx road feel) for full resistance control and Road Feel.
- Power meter — pair a separate power meter here if you have one; use it for power while a smart trainer handles resistance, or on its own. With dual-sided power-meter pedals, pair the pedals here and keep your trainer as the smart trainer, so your power — and your left/right balance — comes from the pedals. See Left/Right Pedal Balance below.
- Virtual power — for a classic (non-smart) trainer, select it from the list and BigRingVR estimates power from the manufacturer's power curve. If your trainer isn't listed, choose Generic Fluid or Generic Magnetic and pair an ANT+ or Bluetooth speed sensor.
Name your configuration (for example "Tacx NEO") and press Save. You can keep several configurations, and the sensor icons in the top bar turn green as each device connects.
Wireless Interference and Sensor Dropouts
ANT+ and Bluetooth both transmit in the 2.4 GHz band — the same band used by Wi-Fi, microwave ovens and most cordless peripherals. If sensors drop out mid-ride, or a trainer loses its connection, interference is usually the cause. Three things fix nearly all of it:
- Move the ANT+ dongle away from the computer. This is the single most effective fix, and it costs almost nothing. USB 3 ports emit radio noise across exactly the frequencies ANT+ uses, so a dongle plugged directly into a laptop — especially next to an external drive or a dock — is sitting in the noise. Use a short USB extension cable to put the dongle a foot or two away from the machine and closer to the bike.
- Use the 5 GHz Wi-Fi network if your signal is strong. Most routers broadcast both a 2.4 GHz and a 5 GHz network. Moving your computer to 5 GHz takes your Wi-Fi out of the band your sensors use entirely, and gives streamed 4K video more room at the same time. The trade-off is range: 5 GHz travels less far and passes through walls poorly, so if your setup is far from the router, a strong 2.4 GHz signal is better than a weak 5 GHz one.
- If you have to stay on 2.4 GHz, choose channel 1 or 6. ANT+ sensors transmit on a fixed frequency of 2457 MHz, which falls inside Wi-Fi channel 11. Channels 1 and 6 sit clear of it. Bluetooth is less affected — it hops between frequencies and can route around a busy network — which is why ANT+ sometimes drops out while Bluetooth sensors keep working on the same setup.
Also worth checking: keep the dongle and the sensors in line of sight of each other where you can, and avoid running a ride with a microwave oven going in the next room.
Configure User Profile
On the User Profile tab you can set your weight and bike weight, as well as Web Ride settings. Make sure to pick the Download Region that is closest to you.
Video plays in 4K, 1080p or 720p. Since version 8.0 playback is hardware-accelerated, so most recent computers handle 1080p easily and reasonably modern machines handle 4K well. Rides available in 4K show a '4K UHD' badge in the ride grid. See the recommended requirements for details.
Not sure which to pick? Run the automatic test that measures your internet connection speed and graphics performance and sets the best quality for you (available in Preferences and in the first-run setup wizard). If video ever stutters, step down one level or download the ride first.
Smart Trainer Settings
These settings only apply to smart trainers. Speed calculation is not affected by these settings — only the brake force applied by the smart trainer. These are very powerful settings to enhance your riding experience. Keep them at maximum values (±25%) for the most realistic terrain experience.
If you want to do intervals, you might want to set Maximum uphill to 4–5%. This way you won't need to shift gears when grades change and can focus on your interval power instead. Video speed is still calculated based on the power you produce, so it won't affect the realism of the ride. Triathletes will find this feature very helpful as it opens up many steep climbs for training. It's also great for recovery rides.
Setting Trainer Difficulty lower than 100% will decrease resistance on climbs and increase it on downhills proportionally. For example, if you set it to 50%, a grade of 10% will be communicated to the trainer as 5%. BigRingVR's speed calculations will still use the original grades, so it will not make you faster — you can think of it as virtual low gears. The default setting in BigRingVR is 100%.
Simulation
If you live and train at elevation but want to correct your power output to sea level, you can adjust the elevation power correction percentage setting. This creates a fair playing field for athletes riding virtually at elevation compared to athletes at sea level.
For example, if an athlete rides at an elevation of 2,100 meters (7,000 feet), the suggested "elevation power correction" setting is 9% — so if the athlete generates 250 W, speed will be calculated based on 272 W (250 W × 1.09). Power will still be displayed and saved as 250 W; only speed is affected. Rides with elevation correction will be marked with an asterisk on the BigRingVR leaderboard.
More information on FTP in relation to altitude can be found in this excellent post by Joe Friel.
Integrations
You can link your Strava, TrainingPeaks or Intervals.icu account so that when a ride is saved it is automatically uploaded as a FIT file to your linked accounts.
Left/Right Pedal Balance
If you ride dual-sided power-meter pedals (for example Favero Assioma DUO), BigRingVR records how your power splits between your left and right legs, over both ANT+ and Bluetooth.
- Pair the pedals as your Power meter in Preferences → Sensors. If you have a smart trainer, keep it as the smart trainer: the trainer controls resistance and the pedals supply the power. A trainer only measures total power, so balance can't come from it. If your pedals also report cadence, you can use them for cadence too.
- Over ANT+, dual-sided pedals appear as a single power meter. Over Bluetooth, some pedals can appear as two entries, one per pedal. Pairing only one of them records that leg's power alone and no balance — use ANT+, or set the pedals to a single combined channel in the manufacturer's app.
- To see it while you ride, choose the Training layout in Preferences → Ride Experience → Metrics layout (it takes effect on your next ride). The L/R cell appears next to power a few seconds after you start pedalling, with the live split and your average underneath.
- After the ride, the End Ride summary shows an L / R balance tile, and the balance is saved to your FIT file, so Strava, TrainingPeaks and Intervals.icu show it too.
Single-sided power meters (one pedal or one crank arm) and smart trainers can't measure balance, so the cell doesn't appear for them.
Let's Ride
If you know the name of the ride, enter it in the filter text box in the top-left corner. You don't need to enter the exact name — typing "Alp" will find "Alpe d'Huez" and any other matching rides. To make finding rides easier, you can filter by Country, Elevation Gain, Difficulty (FIETS), and Estimated Ride Time. Rides can also be sorted by Ride Name, Difficulty, Estimated Ride Time, Elevation Gain, Rating, and Popularity. Pick a ride in the left panel, review the ride profile on the right, then click Select Ride. If you only want to ride part of the course, use the Create New Course button to customize and save a start and finish point.
If you have a good internet connection (3 Mbps+), there is no need to download the ride — simply click the Select Ride button. We strongly recommend trying live streaming before downloading, as it gives you many more ride options.
If your internet connection is not fast enough and you are getting "download buffer low" messages during the live stream, try the Download Video option. Click Download Video, wait for the download to finish, then click Select Ride to proceed. Once the video is downloaded, the Download Video button becomes Delete Video — please use this to free up space when you are ready to download a new ride. During the trial period you can download 1 ride at a time; with a subscription the download limit increases to 30.
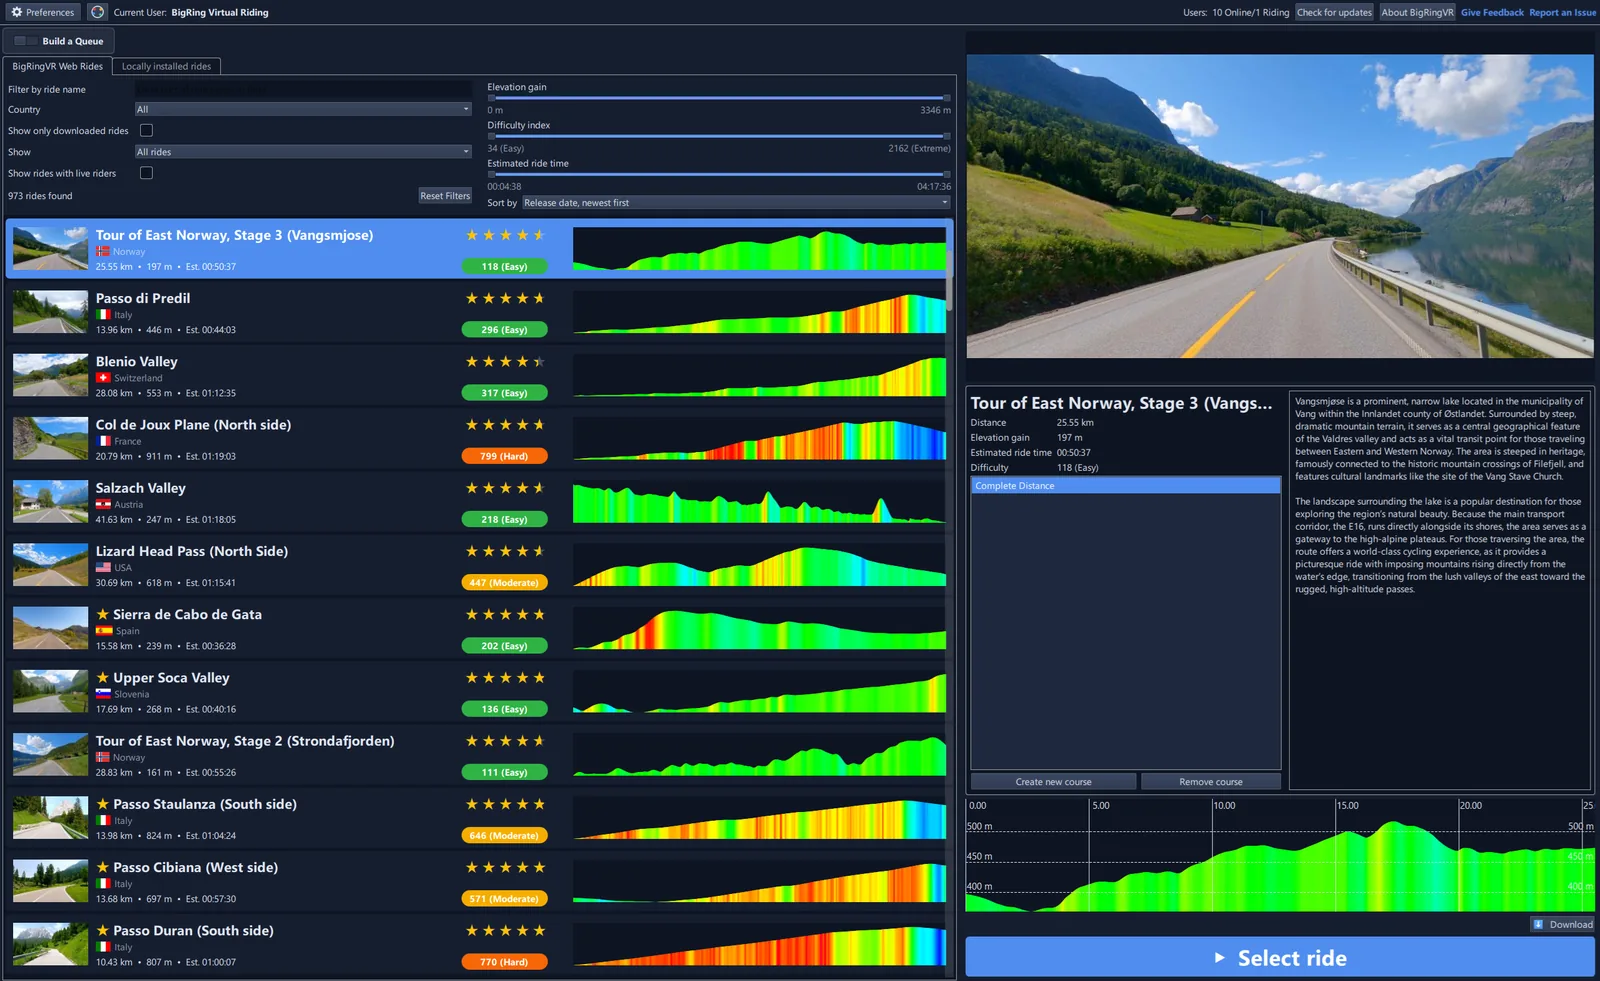
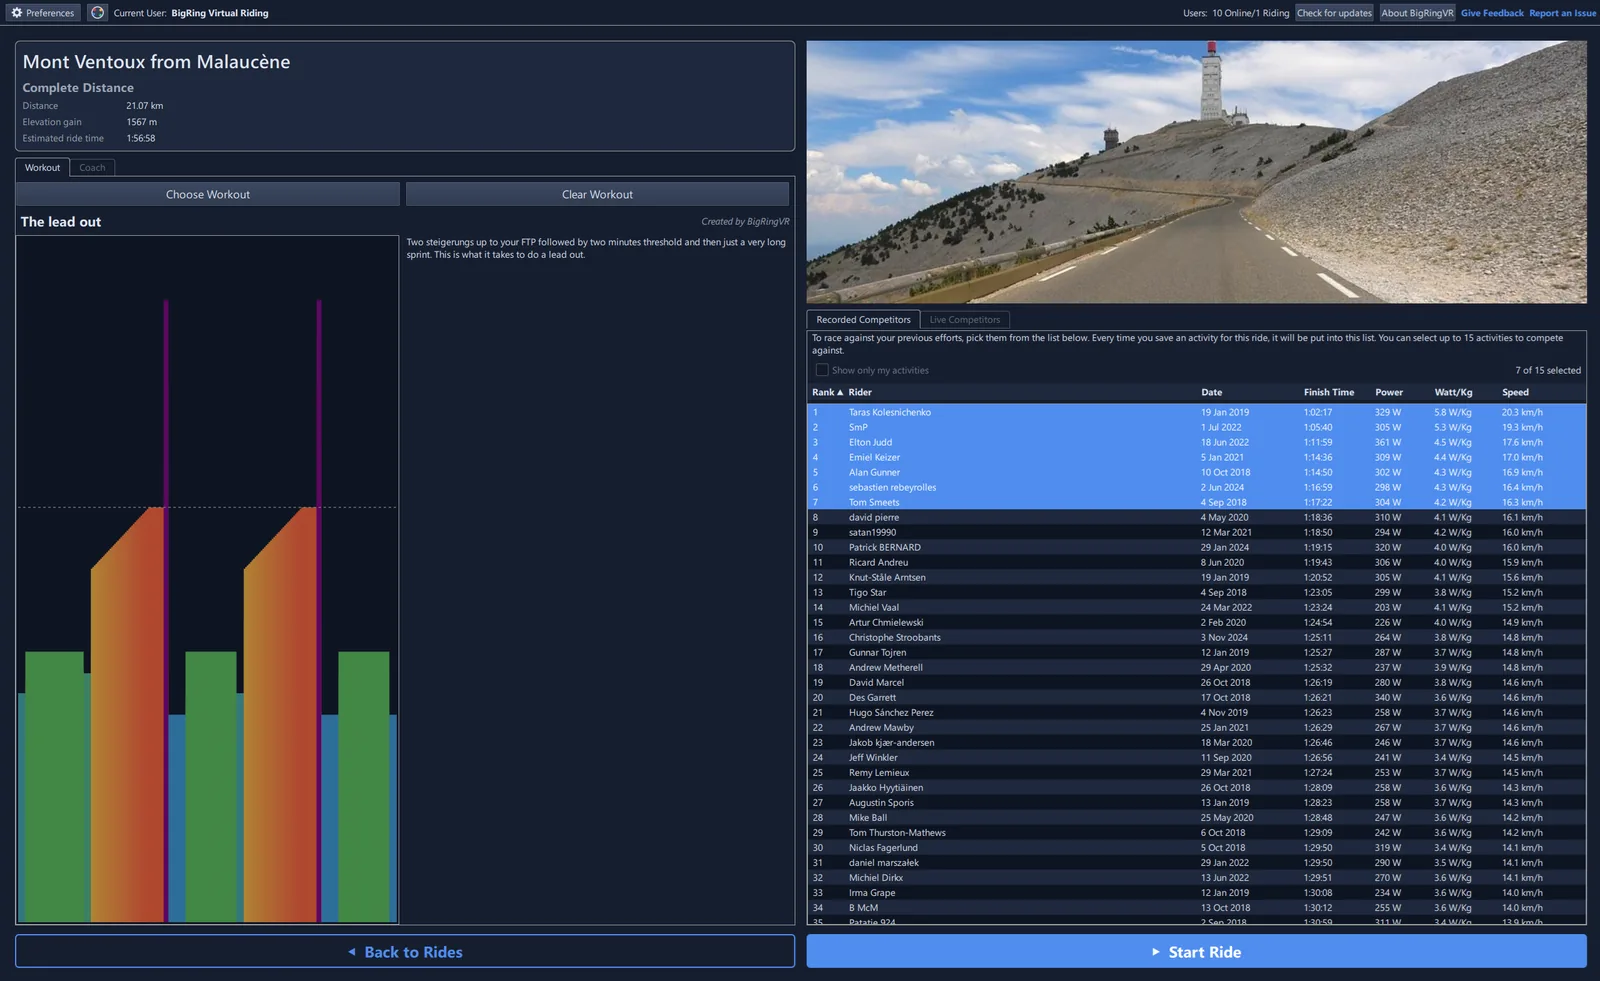
To race against your previous efforts or other riders, pick them from the Activities list. Every time you save an activity for a ride, it will be added to the Activities list. You can select several activities to compete against — the Live Ranking shows the riders nearest you. If you want to race against other riders, make sure to check Enable Activity Sharing in Preferences / User Profile (enabled by default) — if this option is off, you will only see your own efforts. Click Start to ride.
On this screen you can also choose a workout (see below) or the Coach option. The Coach functionality helps you pace your ride — set your Coach at a specific power level and you'll see it as a marker on the profile and in the competitor grid. Just stay with the Coach to maintain your target power. You can increase or decrease Coach power during the ride using the shortcuts listed below.
Keyboard Shortcuts
| Key | Action |
|---|---|
| E | Turn on / off ERG Mode |
| ↑ / ↓ | Raise / lower target ERG power * |
| C | Turn on / off Coach |
| Q or = | Increase Coach power |
| A or - | Decrease Coach power |
| I | Pause / resume the workout |
| Tab | Skip to the next workout interval |
| Space | Mark a lap |
| L | Show lap stats (great for intervals) |
| Esc | End the ride (brings up the End Ride panel) |
| Key | Action |
|---|---|
| V | Cycle profile and metrics panel display |
| P | Cycle profile: full / zoomed-in / split |
| O | Toggle transparent (overlay) profile |
| R | Turn on / off Ranking Screen |
| M | Turn on / off Map view |
| F | Enter / exit full-screen mode |
| S | Take a screenshot of your ride |
| . | Increase fixed power (free ride) |
| , | Decrease fixed power (free ride) |
| H | Show this shortcut list on screen |
Tip: press H anytime during a ride to show these on screen. Prefer the mouse? Right-click the video for a menu with every command — so you can ride without touching the keyboard.
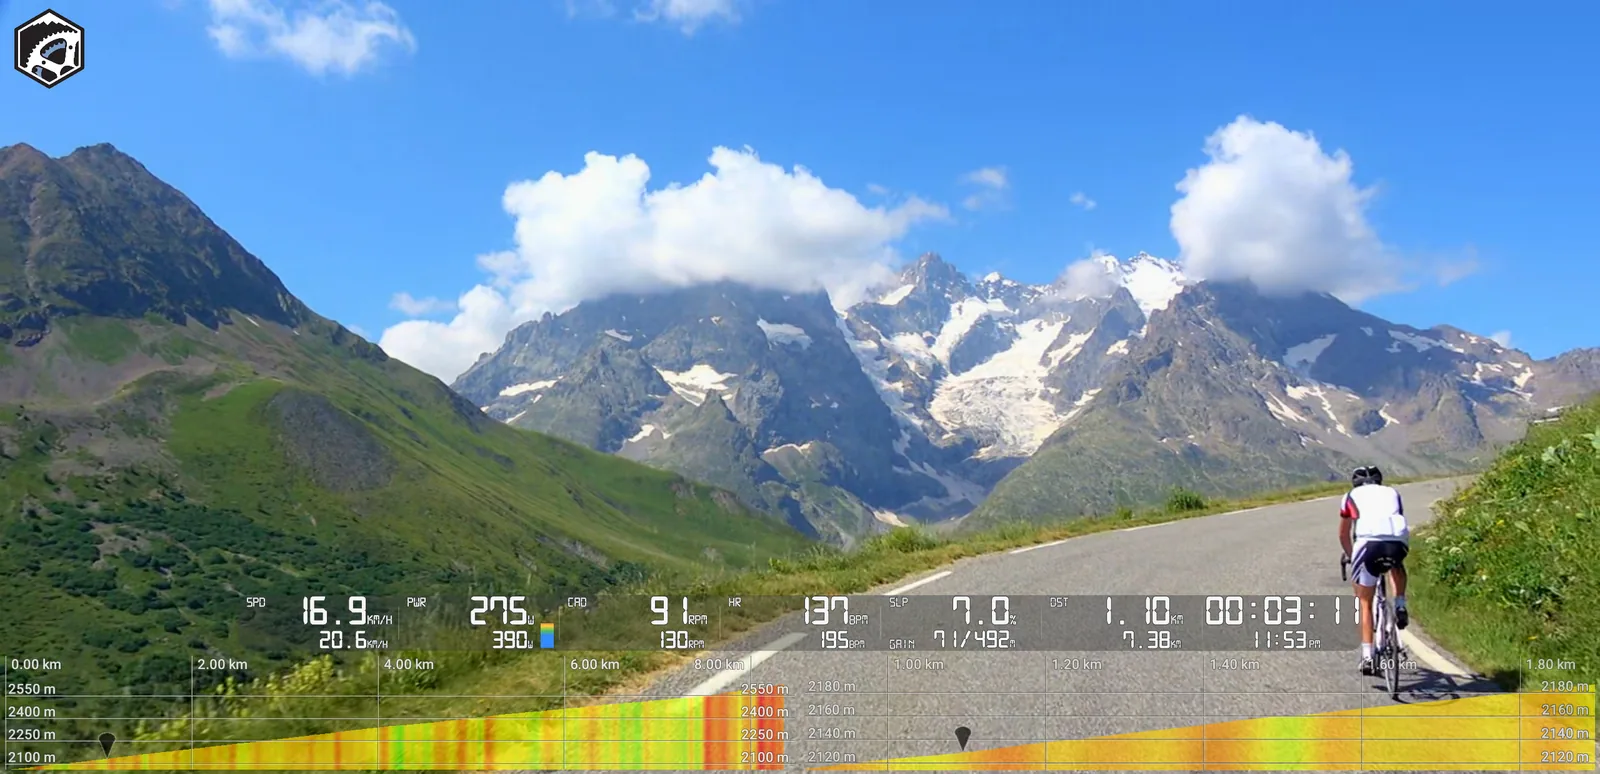
To end the ride, press Esc. You'll see a full ride summary — distance, time, speed, elevation and power, plus Normalized Power, Intensity Factor, TSS, a peak-power chart, time in power zones and your leaderboard placing — and you can save a ride file (the format and save location are set in the General tab — FIT by default, with an option to also keep TCX). If you've linked Strava, TrainingPeaks or Intervals.icu, your ride uploads automatically as a FIT file. If your heart-rate strap provides beat-to-beat (RR) data, your heart-rate variability (HRV) is saved to the FIT file too, ready for analysis in TrainingPeaks or Intervals.icu. With dual-sided power-meter pedals, the summary also shows your left/right balance, and it is saved to the FIT file as well. You can also rate the ride and add it to favorites, which helps our community find the best rides and lets us give you personalized recommendations.
Workouts
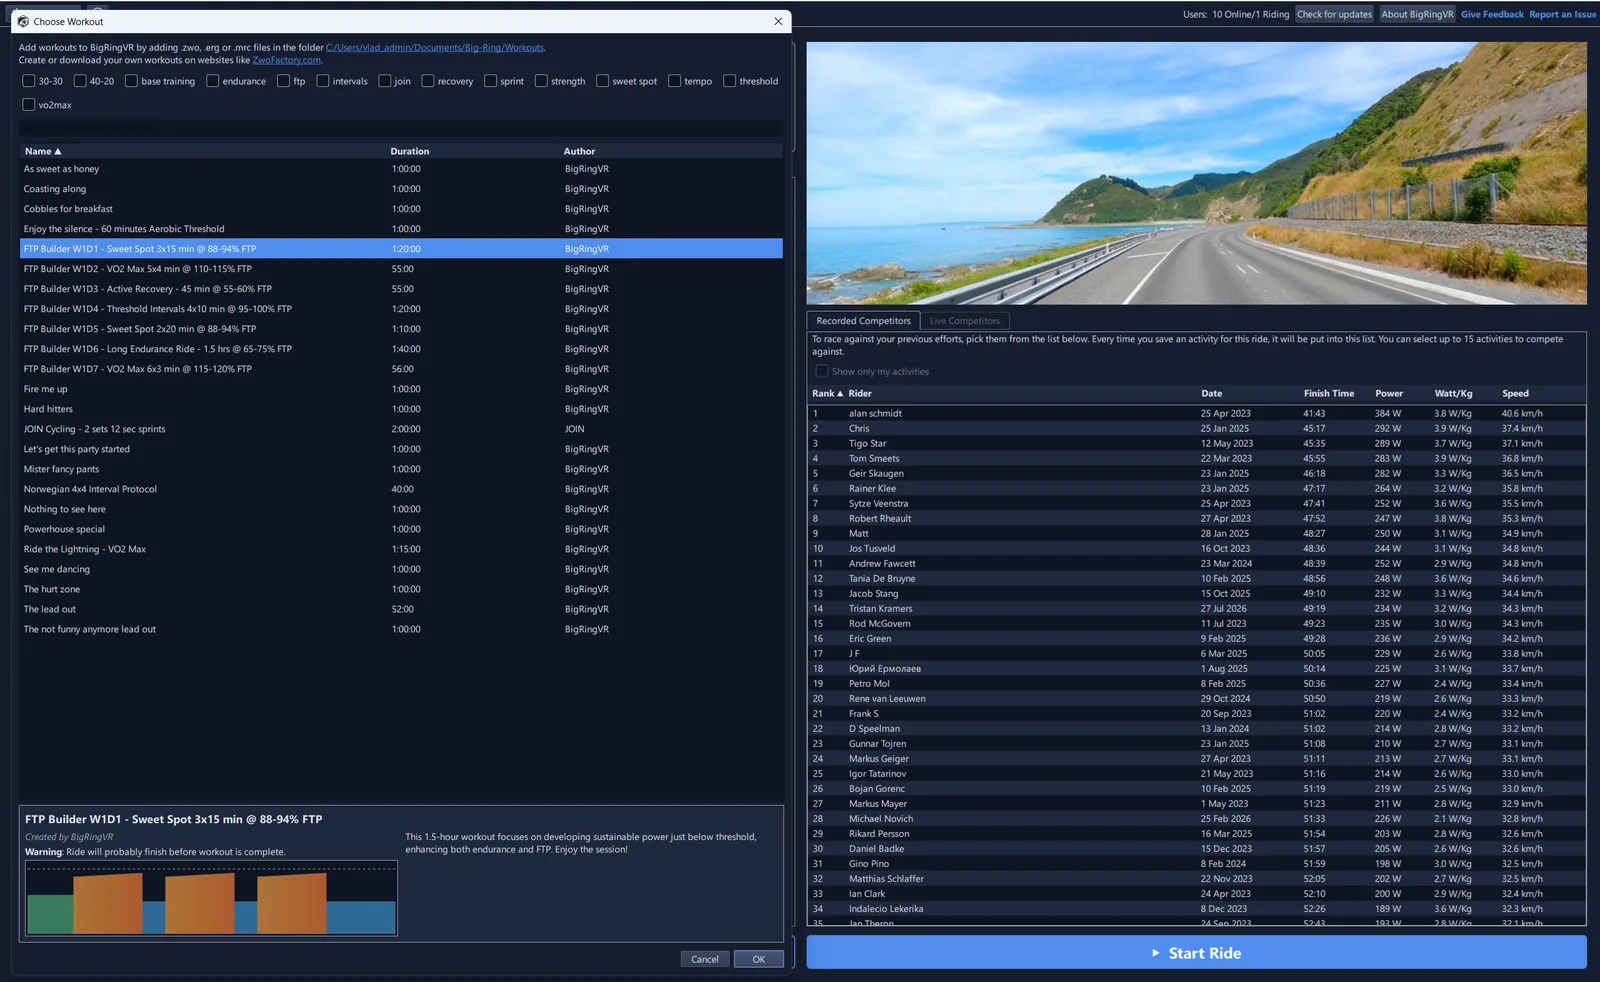
Workouts are currently supported for smart trainers only in ERG mode. After selecting a ride, click the
Choose Workout button to select an ERG mode workout. Workouts are provided by BigRingVR and can also be imported from
.ZWO, .ERG, and .MRC files — to add workouts, place them in the
Documents\Big-Ring\Workouts folder. To get more workouts or create your own custom workouts, please visit
Zwofactory.
Custom user training plans can be found here.
During a workout you can increase or decrease the target power by 2% using the ↑ / ↓ keys. To skip an interval, press Tab.